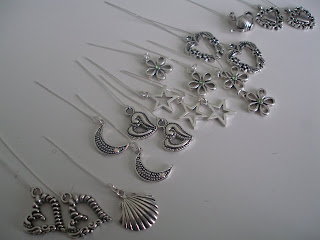
Alrighty then. You've asked, and I'm delivering. Yesterday I made a dozen plus seven scissor leashes. Some will be used for future giveaways, some will be sold in my Etsy shop. But for now, let me show you how easy it is to make your own....
You should also have these two tools. One is a wire cutter, the other small round nose jewelers pliers. You can buy both of these at your local craft shop if you don't already have them. You can get away with not having the wire cutters and use scissors, but DO NOT use your sewing scissors that you'll be blinging out. And you can also use needlenose pliers or flat head tweezers, but having the jewelers pliers will make your work much easier.
Using your pliers, gently open the loop at the end of the eyepin.
Slip on a charm
And gently close the loop, once the charm is on, using your pliers.
I'm a mass production kind of gal, so I like to do all of one step at a time, so I hooked up all of my charms before I moved on to the blinging.
I like to start with a small bead at the bottom. I've then strung a crystal and another small bead....
Then I added a focal point bead and followed that up with a repeat of what I had strung on the eyepin to start. Notice there's a big old piece of wire left art the top. The next thing you are going to do is turn this into a loop, so unless you want a huge loop, this is the time to cut off a smidge of that extra wire.
Making a loop is easy, just clamp on to the tip of the wire with your pliers and wrap it into a circle. Again, this isn't industrial wire, so be gentle, or you'll find yourself breaking that wire you grabbed off and you'll need to start over (not to worry, there's lots of eyepins in a package).
Now we need our 'leash'. These are cell phone straps found in the jewelry findings aisle at Michaels. I couldn't find them at JoAnn, so stick to a craft store or bead outlet when looking for these.
Use your pliers to open the ring at the end of the leash just enough to slip over the loop of the eyepin you just made. Notice that I open my loop by just pulling one end of the loop to the front. I didn't pull the ends apart, I just sort of pushed one side back and one side forward. Doing this makes it easier to close.
Because then all you have to do is give it a gentle squeeze to align the the ring. If you pull apart the ring, you need a flat plier to squeeze the two ends touching together, and you'll likely squeeze your ring out of it's circular shape. This way, your ring stays circular.
Wah-lah! You've now got scissor bling.
Loop the leash around your scissor
Give it a little tug to pull it taut and secure
And now your scissors are definitely identifiable as your own, no matter where they go. (And I like to think they stay sharp longer and cut effortlessly because they are oh so proud and happy to be blinged out :-) )
Oh, and don't forget to bling out your rotary cutters as well. Heck, bling out your plastic rulers. We wouldn't want any of our tools to feel left out now, would we?
Go make bling, and check back later tonight or tomorrow for my Bloggers Quilt Festival entry.


Now I really appreciate all the effort that went into making my giveaway prize. Great tutorial
ReplyDeleteGreat tutorial, I want to bling everything now!
ReplyDeleteExcellent bling tute...:)
ReplyDeleteLove your idea!
ReplyDelete