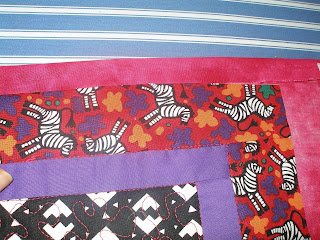
Anyway, since many of us make charity quilts, or flannel baby quilts and don't really want to mess with binding, as these quilts are meant to be loved and laundered, and dragged through the dirt, the best way to bind one of these is to use a 'self binding', or what I like to call a 'cheat binding'. Or more properly....'faux binding'.
After you've quilted your top, trim all around the outside edge of the sandwich.
Flip your quilt over (front side down) and fold back the quilt backing....you don't want to cut this accidently, so best to fold it back as far as you can.
Think about how wide you want your quilt binding to be. I wanted my binding on this quilt to measure 3/4". So once you've figured that out, double that measurement and cut that much off of your quilt front and the batting. (Note, I'm cutting 1-1/2" off of mine.)
Cut carefully.
And be sure to separate the fabric from the batting. You can toss the batting out unless you are a hoarder or have some amazing project that uses batting strips, but keep the fabric because you never know when you're going to want to make a string quilt (I toss all my strips in a plastic storage bin for that day, which I am sure will eventually come to pass).
Now would be a good time to heat up the iron. (I love my little ironing board that Pat's husband made, and the cute little cover my sister got for it at Tarj-eh. Fits right on top of my cutting table for a quick press.)
Flip your quilt back over, face up and fold down the edge of the remaining backing to meet the edge of the quilt top. Press. (Or, if you're lazy, use your fingernail, or your teeth, or just don't--it's up to you.) Do opposite sides (note the corner at the top right) and then do top and bottom.
Now, fold it over one more time. This is the real binding you are going to see, so you might want to actually use an iron this time and save your teeth. You won't need pin or clip this if you're pressed it properly.
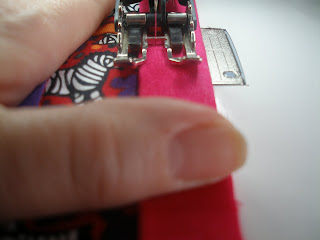
Take it to your machine and use your walking foot to sew it down. You can use the stitch plate seam markings, or line it up with your foot.....whatever works for you, just sew a straight seam, no more than 1/4" from the edge of the binding.
Again, you are going to want to sew the sides first, then top and bottom (or vice versa). When you get to a corner it will help if you fold the edge diagonally to the inside before you proceed down the next length of fabric.
Surprise.... Surprise......Surprise......
Houston....we've got binding! And it took less than an hour, used no additional fabric, and it's straight!
Now this isn't something you are going to want to use on your good quilts, but it's great for table runners, table quilts, charity quilts, etc. Save time and money, and most importantly....frustration.
I hate to tute and run, but there is a bottle of champagne and a dinner I didn't cook, calling my name and I'm already 5 minutes late and need to be on my way. Happy binding!


With champagne and dinner waiting for you I'm very impressed that you posted a great tutorial at all, thanks and I hopoe you enjoyed your meal :)
ReplyDelete