I was up until 3 a.m. prepping for my monthly class with Mimi. I know, I know, I've had 6 full weeks to get everything ready, and in my defense, I did get most things done (i.e., washing and ironing about 72 FQS, and 20 yds of other various and sundry background and border fabric), but class is in 2 hours, and I have still not picked out my first pattern. Sometimes I just like living on the edge.
I do want to share something I came up with last night that might be helpful to you applique fans out there.
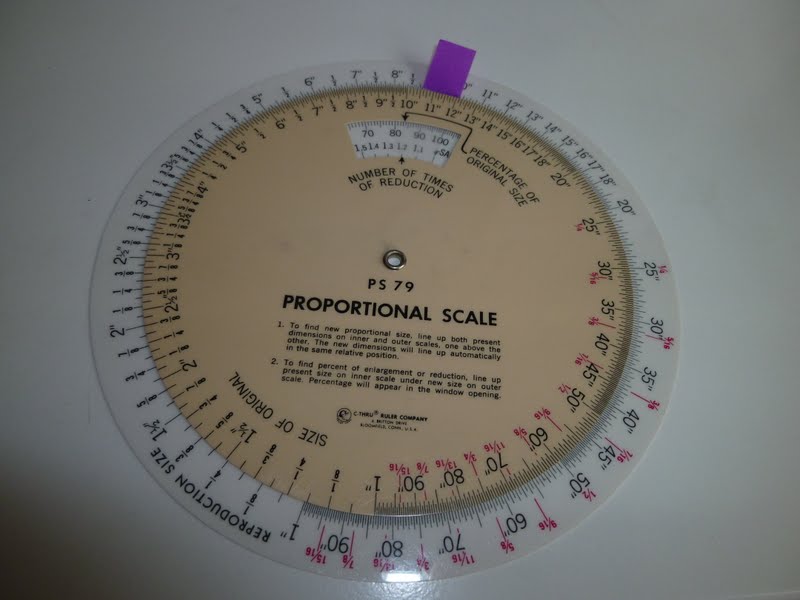
I am working with what will be 14" finished blocks. I was pulling patterns from various sources...Mimi's books, Elly's books, Jane Townsend....they all have different ideas as to how far away from the edges of the blocks the designs are, so I started out measuring the designs and using the proportion wheel to increase/decrease copies of the patterns.
I know all about proportion wheels from my early days in graphic design, and I do know that you can find them in some notions departments, but it's easiest to come across them in office supply stores, or you can contact the C-Thru Ruler Company (Google it).
The purple flag is my marker for the size I want, which is about 10-1/8". Say my design is 6", I line that size up on the inner ring with the size I want on the outer ring (my purple flag) and in the window it tells me that I need to blow that design up on a copy machine at just around 169%.
One important thing to keep in mind is that you want to choose designs that when enlarged/reduced, your leaves, petals, berried are approximately the same size, otherwise you're going to have some pretty strange scale issues between you blocks.
Another thing I asked the hubs to make me was viewing template. He had someone at his office cut me a piece of plexiglass 14" square, which is the finished size of my blocks. I'm putting my blocks on point, and all my designs are rather 'square', so I thought it would be good to have something to set on top of them so I knew how to lay the patterns out on my backgrounds. I'm looking at this last night and thought it would also be a great aid for me in choosing the patterns...I can just lay it on a pattern and see if the design is going to fill the block the way I want.
Last night I took some 1/4" photographic tape (red (see thru) cellophane) I found in my craft supplies and laid my plain plexi on top of a 15" ruler and marked horizontal, vertical and diagonal reference lines on my plexi. Now I've got a center to use to visually gauge my pattern sizes (looks like this one may need to reduce just a tad).
You can get your own plexi cut to spec at Home Depot. And while the red photographic tape may not be easy to come by, you can certainly find colored transparent tapes at the office supply store, or you can use a Sharpie (don't use a dry erase or those pens they use to write on overhead projector slides or you'll have ink all over your hands and fabric).
Hope these were useful tips. I've got to run and toss everything into my tote bag for class. I'll just have to pick my pattern once I get there. (Nothing like a little pressure to get the adrenaline going on a lazy Sunday.) Enjoy your own lazy Sunday afternoon!


I never knew such a tool was available! Too cool. Would it work for pieced blocks too? Say enlarging a 10.5" block to 12"?
ReplyDeleteThis is my first encounter with a proportion wheel. It is pretty cool. Thanks.
ReplyDeleteThanks for the great tip about using the proportion wheel. I think I'll look for one next time I'm at the office supply store. Can't wait to hear about your class today.
ReplyDeleteGood thing we have that 11th hour!! Doing it all of the time, I was cutting a block out this morning for a friend, had three days, I'm waiting until 10 minutes before it goes out the door!
ReplyDeleteThat is the cutest gadget! I learn something new each time I visit your blog.
ReplyDelete